My Experience Using Luminar 2018 to Edit Raw Files
Morning in Muskoka
This is meant to be a short and sweet post. If you have found this page, then you're probably wondering about Luminar 2018 or some later version. As you might have figured, a few of the reviews out there do not feel like reviews; they feel like propaganda. So here are my thoughts.
Long story short
- I'm no pro.
- I used Aperture, which is no longer supported.
- I was looking for a software to replace it and edit Raw files.
- I didn't want to use Lightroom, as I didn't like the price and the subscription model.
- I decided to buy Luminar 2018, but as it had no file management piece (at the time), I used it mainly from within MacOS Photos.
- I liked it a lot at first, but it did not play well with Photos (understatement).
- It took me a long time to edit images and I had to start from scratch every time, because Photos (you don't have this problem with the standalone, but no file management (yet)).
- I realized I tended to over-edit images in Luminar.
- Luminar crashed often when using some of the gradient filters, and I would lose my edits (and have to start from scratch).
- I decided to try Lightroom for a week and loved it.
- I'm no longer using Luminar, except for post-post editing if I have a very specific filter in mind.
The things I like about Luminar 2018
- Layers.
- Customizable workspaces.
- Black and white transfer.
- Lots of filters.
The things I do not like about Luminar 2018
- Does not play nicely with MacOS Photos (this will likely be moot once Luminar gets its Asset Management add-on): you cannot go back to an edited image to rework it; you have to start from scratch every time.
- Local adjustments are one filter apiece, unless you create a layer, but then you have a lot of layers.
- Too many filters (I know, I know, I just said I liked having many filters, but lots is not the same as too many).
Why I'm now working mostly with Lightroom (in other words: What I wish Luminar had or did better)
- When I make basic global edits to the same image in both Lightroom and Luminar, such as dropping highlights and raising shadows, sharpening and noise reduction, I greatly prefer Lightroom's rendering. In particular, I've had strong banding in Luminar when dealing with subtle skies.
- Lightroom has a few automated features, in particular for levelling and cropping, which are a godsend.
- Lightroom has lens profile correction. Very. Useful.
- Lightroom has Camera Calibration. It's very nice to have for Nikon files; I couldn't live without it for Fuji files (I know you can use other Raw developers, but my life is complex enough as it is...).
- Lightroom has many tools to manage lots of pictures and batch process that Luminar is still working on.
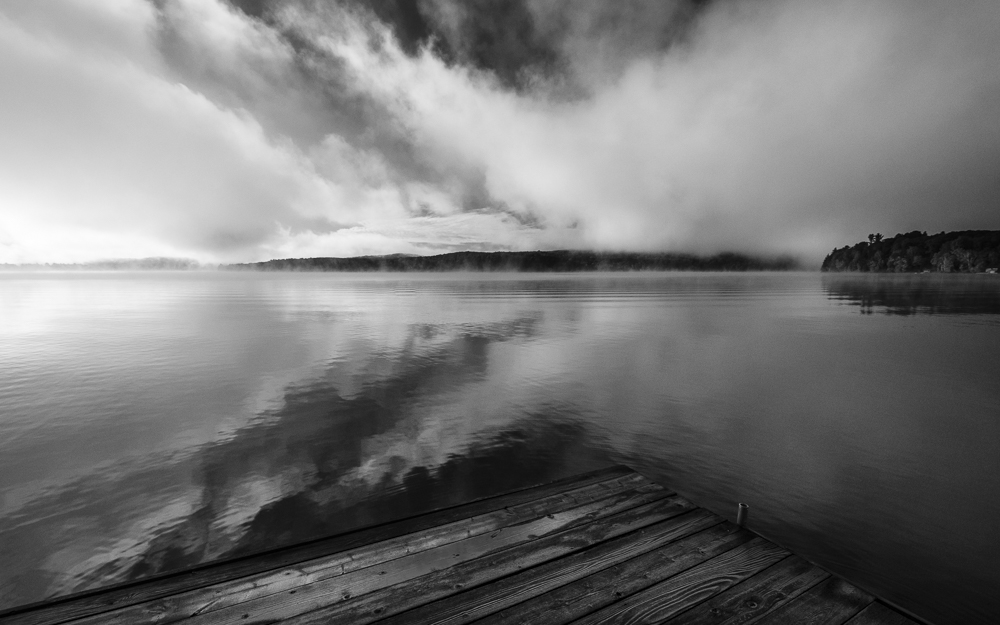
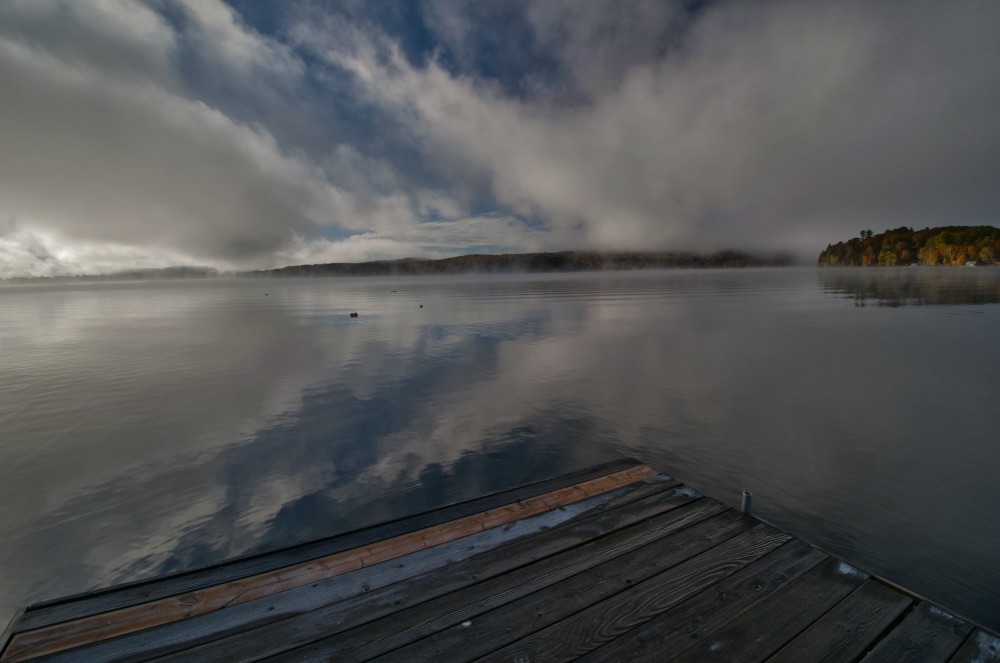
Final note: I still don't like Lightroom's subscription model, but I like what I can do with my images. Looking at the images helps swallow the pill. What did it for me was comparing the rendering. Here is an example. Please click on the image to switch between Luminar and Lightroom's versions.
The two files share similar edits: dropped highlights -100 (max), raised shadows +100 (max), adjusted white and black points on the edge of clipping. In lightroom, I was further able to apply lens correction and apply a Nikon camera calibration profile. Those last two things don't change what seems obvious to me looking at the two pictures: Luminar's Raw Develop module exacerbated the slight banding in the clouds and made it painful. I also prefer how the clouds are handled by Lightroom. I'm sure if you compare the two images, you'll find other differences. Perhaps you'll prefer Luminar's rendering. Best if you download the trial versions for both softwares, try a challenging raw file, and reach your own conclusions. I did, and I was surprised.
Hope this helps your own tortuous musings.


